Fence Installation
Fences

Tips For Fence Installation

Whether a fence is installed to define a property line or to demarcate a home’s garden, it must be built properly to ensure its strength and longevity. Choosing the right material is also important.Fence Installation

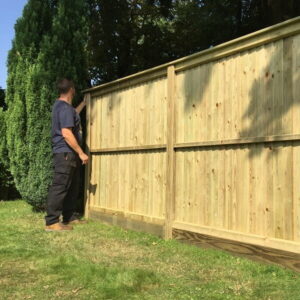
Before beginning the work, contact 811 to mark any buried gas or utility lines. Once marked, place stakes where fence posts will go, usually 6-feet to 8-feet apart. Visit https://www.roundrockfencerepair.com for more information.

When deciding on how much to spend on a fence, homeowners should consider factors such as the type of material and how much maintenance it will require. Some wood types, such as pine, are less expensive than others like redwood, but they may also need more frequent staining to prevent insect infestations and other damage.

The type of fence chosen should be suited to the climate where the home is located. For example, if the area tends to get a lot of rain, choosing a type of wood that will not warp or be susceptible to mildew growth and rot is important. Similarly, if the area has a lot of snow, it is best to choose lumber that will be able to withstand the weight of drifts.

Another factor that will affect the cost of a fence is the size of the property being fenced. Generally, the larger the area to be fenced, the higher the cost. It is often a good idea to hire a professional installation company to reduce the risk of errors during the construction process and ensure the fence will be straight and sturdy for years to come.

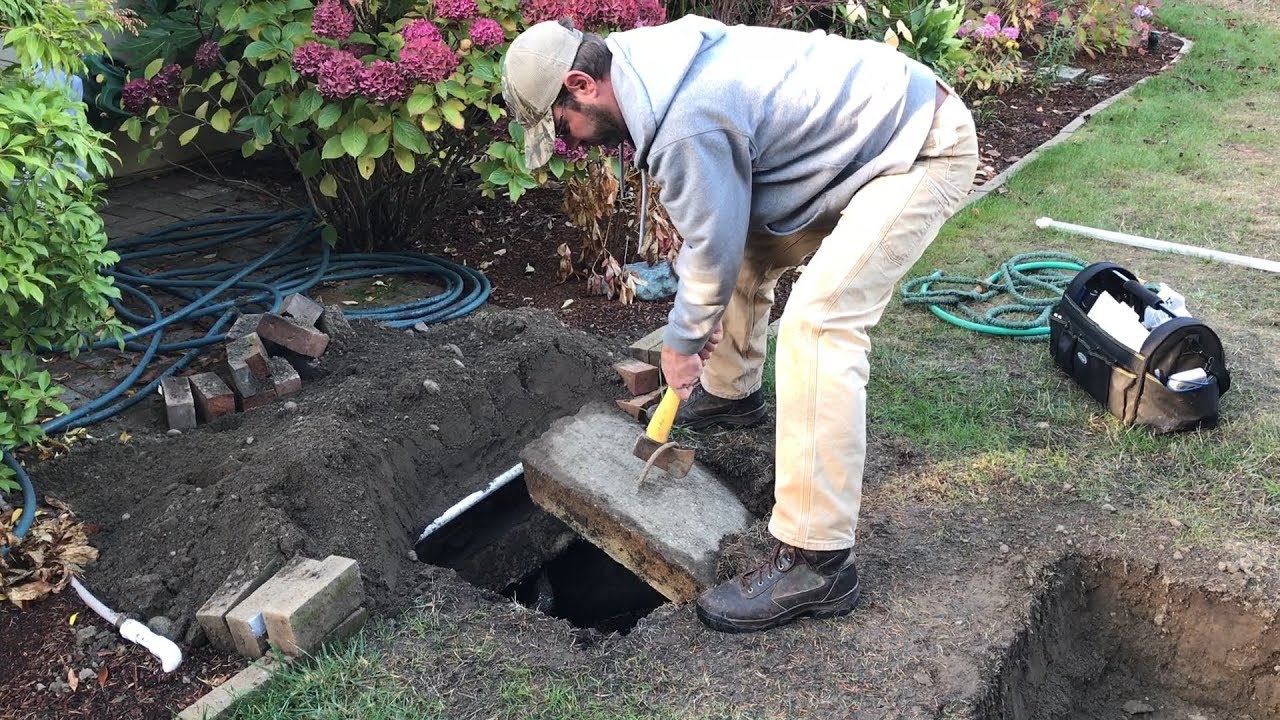
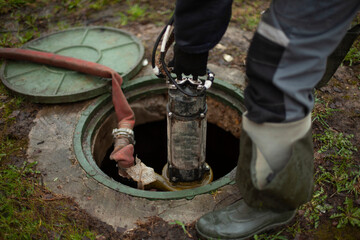
Additional costs for fence installation may include removing existing structures, digging holes to set posts and regrading the ground. These costs can add up quickly and significantly affect the overall price of the project. It is also a good idea to have your contractor check for underground utilities before starting work, as hitting a utility line could be costly and dangerous for both the homeowner and the installer. In some cases, a permit may be required for fence installation, and homeowners should check with their local municipality and homeowner association (HOA) to find out about requirements and fees.

Design

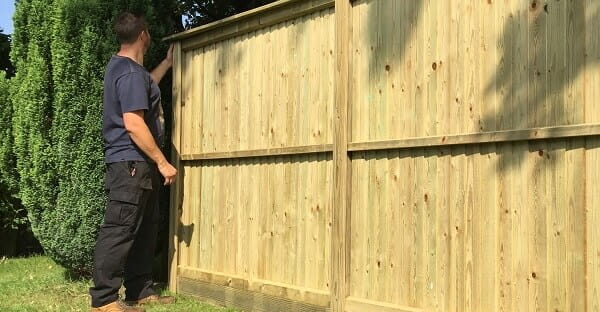
Before you begin installing a fence, you should consider its design. This will affect the overall look of your property and determine how much privacy you’ll have. There are many different styles of fences to choose from, so it’s important to pick one that suits your tastes and needs. Some options include wood, chain-link, and vinyl fencing. Each has its own advantages and disadvantages, so it’s important to do your research before making a final decision.

It’s also a good idea to consult with your neighbors before beginning the installation process. This will ensure that you are building a fence that is not only aesthetically pleasing, but also meets local regulations. In addition, it’s a good idea to make sure that your fence doesn’t obstruct their views or cause any other problems.

Once you’ve chosen a style of fence, you’ll need to mark the perimeter of your yard with stakes and string. This will help you find the exact location of your fence posts and ensure that it is straight. For the best results, it’s usually a good idea to use metal stakes rather than wooden ones, as these are more durable and will stand up better to weather elements.

Posts are the structural element of a fence and they hold up the rails and pickets that form the fence itself. There are 3 types of posts: terminal, corner, and line posts. Terminal posts are placed at the start and end points of a fence, corner posts are located at every bend in a fence line, and line posts are those in between.

Before you set your fence posts, it’s a good idea to prepare the area by digging a hole that’s at least as deep as the height of the post. Afterwards, add gravel to the bottom of the hole and spread it evenly. This will direct rain and snow melt away from the posts and help them last longer.

Materials

Whether you want to create privacy, demarcate property lines, or simply keep animals and children off your lawn, fences can do it all. But when choosing a fence material, make sure it’s the right one for your needs and budget. From wrought iron to chain-link, wood to vinyl and aluminum, there are many options available.

Wood is a popular option because of its natural look and durability. Cedar, for example, has a deep red color and tight grain that resists warping and shrinkage. But despite their advantages, wooden fences require regular maintenance and staining to prevent sun damage. Consequently, they’re usually more expensive than other materials, especially if you’re using cedar.

If you’re on a tighter budget, composite fencing might be the best choice for you. This type of fence is made of a combination of wood fibers and plastic polymers. However, it’s important to note that composite fences aren’t as durable as wood or vinyl, and they can be prone to moisture and weather damage.

For a more luxurious option, consider a wrought iron fence. Wrought iron is incredibly strong, and when properly maintained, it can last for years. But it’s also a bit more expensive than other metal options.

It’s important to check with your homeowners association or local government before installing a fence. Some neighborhoods have restrictions on the type and style of fence you can have, and you may need a permit to build a fence in your backyard. If you’re not familiar with your local regulations, contact a fence contractor to learn more. They can help you navigate your local laws and provide a quote for your fence installation project.

Permits

Fences are a common addition to homes for a number of reasons. Some people install them to add privacy, while others use them as a safety measure around children or pets. They can also be used to create a visual separation between properties or to add aesthetics to the landscape. Regardless of the reason, it is important to understand the different steps that are involved in installing a fence. This includes determining property lines and getting the right permits.

Whether or not you need a permit for your fence depends on local regulations, codes and zoning. This includes how tall your fence can be, what materials you can use and if there are any other restrictions. It is also a good idea to check with your neighbors to see if they have any concerns or restrictions.

Most places require a site plan and inspections to determine if your fence is up to code. The plan will also be analyzed to determine if the structure is going to interfere with any utilities on your property. In addition, you may need to contact 811 before you begin construction so that the utility company can mark any underground lines.

When it comes to residential and commercial fencing, the permit process is generally the same. You will need to submit a plan for review and inspections along with the proper fees. Once the plan is approved, you will be issued a permit to begin construction. You must always follow the guidelines set forth in the permit to avoid any violations. If you do not follow the guidelines, you could be required to remove your fence at your own expense.

Contractors

When hiring fence contractors, it’s important to do your homework. Ask neighbors, friends and family for recommendations and read online reviews. Ask about rates and whether the fence company offers a warranty on their work. It’s also a good idea to ask what kind of insurance they carry.

When obtaining estimates, the best companies will visit your home and survey the yard. They will look for things like underground utilities, sheds and landscaping that could be impacted by the fence. They will also consider connection points to your neighbor’s property lines. They’ll ask about the type of fence you want and what obstacles may need to be overcome, such as sloping grounds or tree roots.

A good fence contractor will know the local zoning rules and which fence materials last the longest in your area’s climate. They will also know which types of fences require a permit and how far away from property lines they need to be.

Once you’ve chosen a fence company, it’s a good idea to prepare the work site before the crew arrives. Remove items from the yard that you don’t need and move anything that can be easily moved. This will make it easier for the workers to complete their job quickly and efficiently.

During the estimate process, it’s a good idea to ask questions about the fence company’s experience and expertise. You can also ask for references from previous customers. If the fence company is a large chain, you might be able to get information from their website or contact their customer service department for more details. In addition, ask the company if they will call the local utility locator to mark any underground lines before starting construction.

Sewer Repair
Plumbing

How to Prevent Sewer Repair

Most homeowners cringe at the thought of replacing their sewer pipes. They imagine large ditches, heavy machinery, and destroyed landscapes.Sewer Repair

But the good news is that trenchless technology has changed sewer repair. This method offers a faster, cleaner, and more affordable solution to traditional pipe replacement. The first step is determining the extent of damage to your sewer line. For professional assistance, contact Plumber Woodland Hills now!

Tree roots are an integral part of a tree’s health, providing uptake of water and nutrients while also anchoring the trees. However, root growth can be a huge problem for homeowners when they invade the sewer line. Attracted to a sewer line’s water and nutrient source, they will grow into and around the pipe until it eventually clogs or breaks. While a broken or clogged sewer pipe is certainly a serious issue, it’s also important to remember that there are preventative measures you can take to help prevent these issues from occurring.

Typically, the first sign of trouble is a slow draining shower or sink. If these issues persist, a professional can use a plumber’s snake to clear the blockage and determine whether or not roots are the cause of the issue.

Invasive roots are not just a nuisance; they can be extremely dangerous. A weakened or damaged sewer pipe can break apart, causing the release of raw sewage into your home and yard. The damage caused by this can be quite extensive, and may even require a complete replacement of your sewer lines.

When it comes to preventing invasive tree roots from damaging your sewer line, the best thing you can do is keep the trees on your property well-groomed and away from the area where the sewer lines are located. It’s also a good idea to have your pipes inspected regularly with a camera to identify any potential problems before they become an emergency situation.

Most modern plumbing and sewer systems are made with PVC or other types of plastic pipes that are tightly sealed. As a result, they aren’t as susceptible to tree root invasions as older clay pipes. However, even these newer pipes can be subject to damage from tree roots if they have a crack or leak in the line. Taking the time to schedule a routine plumbing checkup and replace your older pipes can save you thousands of dollars in potential repairs down the road.

Corrosion

The metal pipes that make up the sewer system are sturdy and durable, but they’re not indestructible. Like all metal, they corrode over time when they interact with chemicals and natural elements. This corrosion can lead to breaks and other problems with the line. Some signs that a pipe is corroded include low water pressure, high water bills and cloudy or discolored water. A plumber can test your plumbing for corrosion and determine if a repair or replacement is necessary.

While corrosion is inevitable over time, it’s possible to prevent some of the issues that come with aging and wear-and-tear by taking proactive measures. Using a water softener and/or a water filter can help reduce the amount of harsh minerals that travel through your pipes. These minerals can cause clogs and speed up the wear-and-tear process.

A damaged or broken sewer line can lead to sewage spilling out of your home and into your yard, which isn’t just disgusting but is also a health hazard. The toxic waste can contaminate the surrounding soil and water, and it can even get into your drinking water.

Many older pipes are susceptible to corrosion because they were made of steel, iron or unlined concrete. Replacing these pipes with corrosive-resistant materials can help avoid future problems and keep your family safe.

Corrosion can also happen inside your house if the piping is in need of repair or replacement. This can be seen by a clogged drain or toilet that is slow to drain, as well as gurgling noises coming from your bathtub or shower. In these cases, a professional plumber should inspect the plumbing and sewer lines to identify the cause of the issue.

A sewer camera inspection can be used to locate the source of the problem, and a trenchless method such as micro-tunneling or pipe bursting can be used to replace the damaged line without digging up your entire backyard. These methods can be much quicker and more affordable than traditional sewer repairs. If you’re looking for a company that offers comprehensive sewer services, contact us today!

Sewage Smells

Sewage smells can be a sign of problems in your sewer line, and they are certainly not something you want to deal with on a daily basis. A few DIY drain odor eliminators such as baking soda, vinegar, and hot water can help to keep the odors at bay for the time being. However, if your efforts are not successful in eliminating the smells, it is most likely time to call a professional plumber for help.

The most common cause of sewage smells is when the drain trap’s water barrier has dried out. All of the drains in your home should have a water barrier to keep sewage gases from entering the house. This includes both the p-traps found under your sinks and the clean-out plugs at each end of your home’s sewer lines. If you notice that the drains in your home are not containing water or a barrier, it is time to check the clean-out plugs, the p-traps, or the vent system for problems.

If you notice that a particular smell is coming from more than one drain in your home, it could indicate a larger problem in the sewer line itself. This could be a result of broken pipes, clogs, or structural abnormalities in the line itself. If the problem is not addressed quickly, it can lead to more serious issues and a costly sewer line replacement.

Another possible issue that can cause sewage smells is when the oxidizers in the sewage line have been depleted. These oxidizers are added to the sewage to reduce the amount of hydrogen sulfide in it, which can produce foul odors. The oxidizers are typically added in small amounts, which is why they can easily depleted over time.

When the oxidizers in your sewage line are low, it may be time to flush the entire system and add more. This will help to eliminate any odors and also ensure that the oxidizers are distributed evenly throughout the system. A plumber will also be able to determine if this is the best course of action in your situation.

Gurgling Sounds

A gurgling sound in the plumbing is a sign of air or gas trapped in a pipe. This can be caused by a drain clog that is blocking the flow of water or by a vent pipe that has become blocked. The physics are fairly simple: When a clog stops the flow of water, it creates negative pressure in the lower portions of the pipe and a vacuum in the upper sections close to the fixtures. The pressure or vacuum causes a movement of the sewage and air, creating the gurgling sound.

The most common reason for a gurgling sound is a blocked sewer line. This large line takes all the waste from your home’s drains and channels it to the city sewer system. If this clogs, all of your drains will be affected. A clog in the main sewer line is usually beyond your control, and will need to be fixed by your town or the local water company.

Another cause of a gurgling toilet is when the flapper in the tank isn’t working properly. The purpose of the flapper is to open when water flows into the tank and to close when the toilet flushes. If this part doesn’t work, the water won’t flow through the pipe properly and will remain in the tank. This can result in a gurgling noise, as the water in the tank will be moving around without an outlet.

In some cases, a gurgling sound could be coming from the vent stack on your roof. This vertical pipe helps control your plumbing’s air pressure and releases exhaust gas, but it can also get clogged with debris. A clog in the vent stack can affect your plumbing, leading to slow draining and foul sewer smells. It’s best to leave these jobs to professionals, as they have specialized equipment such as cameras that can drop into the vent stack or powerful sewer diggers that can cut right through tree roots and clogged sewer lines.

If you notice a gurgling sound, it is important to act quickly. A clogged sewer line can lead to serious problems, including sewage backups and dangerous health issues for you and your family. A professional plumber will be able to diagnose the issue and give you the best options for repair.

Drywall Services
Drywall Services

Drywall Repair – How to Repair Small Holes in the Wall

Drywall is a great building material, but it is prone to damage. Fortunately, minor dents and scratches can often be repaired using joint compound (also known as drywall mud) and some sanding. Tiny holes from nails, screws, hooks, picture hangers, and wall anchors can be fixed by filling them with drywall mud or spackle and then lightly sanding the surface. This is a quick and easy repair that only takes minutes to complete. Read on Drywall Repair Las Vegas to learn more.

Drywall ServicesDrywall repair can be a satisfying DIY project but requires the right tools. You’ll find drywall repair tools at home improvement stores, hardware shops and online. You may even have some already in your toolbox or kitchen drawer. Some are designed for large repairs, while others are ideal for smaller jobs.

One of the most useful drywall repair tools is a tape measure. It’s a great way to get accurate measurements without asking an assistant. It’s also handy for tracking how much mud you’re using, and it has a rigid design that prevents it from bending over time. Another important drywall repair tool is a drywall hammer. This type of hammer is specifically made for drywall and has a shaped head that minimizes damage to the wall when striking it.

A drywall saw is another important tool for cutting drywall and other materials like wood and metal. It’s a lot more precise than other saws and is often used to cut the edges of drywall after it’s installed. A drywall knife is another must-have tool for mixing and applying drywall compound. It’s also helpful for filling dents and repairing corners. Some drywall knives come with an attached plastic compound spreader, which saves you time by eliminating the need to apply another coat of mud over the knife.

For more extensive drywall repair, you should invest in a drywall router. This is a tool that can make light and heavy cuts in drywall. It also has a variety of bits that allow you to work with different materials and textures. A drywall router can be expensive, but it’s one of the most useful tools for any DIYer.

While no homeowner looks forward to repairing a hole in their drywall, the process is not difficult or expensive. With the right drywall repair tools and supplies, it can be done quickly and easily. Using the proper technique will give you a flawless result that’s almost invisible to anyone but you. However, if the damage is extensive or you’re not comfortable working with power tools, it’s best to hire a professional.

Drywall Repair Supplies

When repairing drywall holes, you will need more than just a few tools. Some holes require special materials to ensure a strong, high-quality repair. For example, a large hole may need an actual sheet of drywall or some sort of patch to reinforce the existing structure. For smaller holes, you can use spackle or joint compound along with a small putty knife and sanding block. When dealing with textured holes, you might also need a texture sprayer.

For a complete repair kit that has all the tools you need to do a professional job, look for one like the Stella Sealants Drywall Repair Kit Pro. This kit has everything you need to perform a quality DIY repair, including an actual sheet of drywall and wooden boards that will secure it, as well as drywall nails and a knife. This is a more thorough and ambitious kit than most, but it can be useful for anyone looking to do a high-quality repair independently.

Alternatively, you can find a more modestly priced kit with the basics. For example, the Homax Drywall Patch and Repair Kit contains everything you need to repair a small hole up to three inches wide. This kit features a spackling compound and self-adhesive patch that is easy to sand and paint once it sets. It’s a great option for beginners or anyone who doesn’t want to buy multiple specialized supplies.

Many repair kits come with a spackling knife or some other tool to help you get the job done. Some spackling knives are designed to be more durable than others and feature an ergonomic design that fits your hand better. This can make a big difference in how comfortable it is to hold and use.

Other drywall repair tools are more versatile and can be used for multiple purposes. For instance, some can also be used to scrape paint and putty from surfaces or to clean a surface before painting. Some can even be used to cut drywall, which is helpful when you need to shape the edges of a patch or other project.

Drywall Repair Techniques

Small dents, dings, and nail or screw holes in drywall can usually be patched with either spackle or joint compound. Use mesh tape in the corners of a patch and on both sides to strengthen the repair, reduce shifting, and prevent future holes. Apply a thin layer of joint compound over the damaged area, letting it dry between applications. Then use a putty knife to smooth the surface and feather the edges. This helps the drywall repair blend in with the surrounding wall. Choose self-primed spackle for small DIY jobs to save time and eliminate the need for a separate primer coat, which can cause the spot to look different than the rest of the wall.

Cracks in drywall are more difficult to fix than holes, but the method used depends on the severity of the crack. Hairline cracks are common around windows and doors, caused by the house settling and lumber shrinkage in the framing. These cracks can be filled with a flexible drywall compound that will move with the house and prevent them from reappearing.

Larger cracks or humps in drywall will require a larger patch and may need to be reinforced with metal strips if the crack extends across a door frame or into a ceiling. If the crack is isolated, use a putty knife to apply a thin layer of joint compound over it and press paper tape into place. Once dry, sand the crack to remove ridges and create a smooth surface for painting.

If the entire edge of a piece of drywall is damaged, it will likely need to be replaced. This is easier than it sounds, but it requires a bit more skill and practice. Start by putting down a thin bed of drywall joint compound and pressing the paper tape into place. Then, spread a second coat of compound over the tape to fill in the hole and smooth the surface. Use a wide putty knife to make sure that the compound extends evenly and don’t forget to sand and prime the repaired area.

Drywall Repair Tips

A small hole or crack in drywall can detract from the look of your home. But with the right tools and a little drywall repair know-how, you can fix the problem yourself.

When repairing small holes, start by identifying the source of the problem. A stud, a metal strip called corner bead or a nail pop are common causes of holes in drywall. You can identify a stud by using a level and drawing a vertical line along the surface of the wall to center the next horizontal line on a wall stud. Identifying the location of a stud is important because utilities, including electrical wiring and plumbing, run along drywall’s studs. Avoid cutting these wires or pipes by locating the stud locations before beginning any drywall repairs.

Unless the drywall is damaged beyond repair, fill in the hole with a thin layer of spackle or joint compound. Choose a product that dries quickly so you can complete the repair sooner. Apply the compound with a putty knife, smoothing it out as you go. After the first coat dries, apply a second coat and sand it smooth. When you’re done, sand the area again lightly with 100-grit sandpaper to smooth the repaired surface. Then, prime and paint the area.

Nail or screw pops are often caused by lumber shrinkage, a loose nail or screw, or a loose piece of drywall that hasn’t been fixed properly. Use a utility knife to cut away any protruding surface paper or gypsum. Then screw or nail in a new screw or a drywall nail that’s the same size as the old one. Apply a small amount of spackling compound over the nail or screw, smoothing it out with a putty knife as you work. Allow the compound to dry, sand it again with 100-grit sandpaper, and then prime and paint.

Hairline drywall cracks aren’t as dangerous as they sound. They’re caused by settling in your home, and are usually limited to one or two inches in length. Instead of repairing these hairline cracks, which may require more expensive materials, simply spray them with an elastic crack cover-up such as Good-Bye Cracks. Follow the application directions on the label, and let the spray dry.

septic inspection
Plumbing

The Importance of a Septic Inspection

If you are considering buying a home, you should hire Septic Inspection CT service to check the condition of the septic system. A septic inspection is a great way to make sure your new home is safe from sewer overflow or other problems. Visual inspections can reveal problems if your septic system is not functioning properly.septic inspection

A septic inspector will use a visual inspection to evaluate the health of your home’s septic system. They will ask you questions about the house and the tank, and check the water pressure and drain field conditions. They may also look for signs of a cesspool or standing water. Most real estate experts recommend a full inspection before purchasing a home.

The first step of the inspection is to locate the septic tank. The location can be found on the permit sketch of the property. If you are unsure of where the septic tank is located, the inspector will use a probe to locate it. A radio transmitter is another option. The transmitter is about the size of an aspirin bottle. Once the inspector locates the tank, they can retrieve the transmitter.

Before the septic inspector can start inspecting the system, he or she must ensure the flow of water in and out of the septic tank. This is done by running a test, known as a hydraulic load test. The test will determine whether the system is equipped to absorb the daily wastewater volume.

The inspector must check all components of the tank, including the baffles and tees. Baffles are concrete devices that allow wastewater to slowly enter and leave the tank. These components should be cleaned and checked for corrosion. Tees, on the other hand, are fittings for 18″ PVC pipes that plunge straight down. The septic company should also check the pipes entering the tank.

Septic tank lids are made of thick concrete, and the inspector must be specially equipped to open them. Unfortunately, many are already damaged when he or she arrives at a property. For this reason, many inspectors carry spare standard-size lids in their trucks. These lids are also called “coffin lids” because they weigh over a hundred pounds.

During a septic inspection, a home inspector will normally conduct a visual examination of the septic system. This includes checking the age of the system and maintenance history. They will also perform pressure testing, which shows if the system is equipped to handle water pressure. They will also look at the drain field, and note whether any areas are filled with standing water. If this is the case, the drain field will likely need to be replaced.

An observer will then watch the rate at which the water level in the hole decreases. A drop of one inch or more within three minutes is considered good. A large drop in water level over that time would indicate that soil exchange is taking place and special design measures were necessary.

If you are planning to sell your home, a septic inspection may be part of the process. If there are any problems with the septic system, you may want to demand that the seller make necessary repairs. This is one reason why it is important to learn the exact location of a septic inspection.

Septic tanks are made from a variety of materials, including concrete, plastic, and fiberglass. They may be equipped with baffles or tees. The baffles are designed to regulate the flow of waste. They are usually fitted during the manufacture of the tank. However, they can wear out and eventually require replacement.

In order to protect your health and the health of your family, it is essential to have your septic system inspected regularly. This system is underground and often goes unnoticed by homeowners until there is a problem. However, the most important aspect of your house is the septic system.

When buying a new home, a septic inspection is necessary to ensure that there are no problems. However, you should make sure that you have a clear understanding of the cost and the criteria for the inspection. A septic inspection usually takes between two and a half hours. This will vary depending on the size of the tank. A home buyer should coordinate the septic test with the general inspection of the property. By coordinating the two, a home buyer can close the deal sooner.

The cost of a septic inspection can range from between two and three hundred dollars, depending on the size of the tank and system. The cost is considerably lower than the cost of a drain field replacement, which can range from $2,500 to ten thousand dollars.